Do you use MS Teams?
Due to this pandemic situation, the usage of these video conferencing apps also increased and most of the classes and lectures and conferences are conducted in Teams nowadays.
Repository for Ultimate Resource in python. Drop a star if you find it useful! Got anything to add? Open a PR on the same!
Disclaimer: This code is for educational purposes only and the author is not responsible for any consequences resulted. Please do not try it if you do not agree with the condition.
Do you wish to automate MS teams?

Let us see how I have automated Teams so that it automatically logs into one's meetings/classes on time.
Pre-requisites:
- Microsoft Teams application
- Python
- Pyautogui
Microsoft Teams application
MS Teams is a popular chat and video conferencing app which allows us to attend/conduct meetings.
You can download it by clicking at the Link
PyAutoGui
PyAutoGUI is a cross-platform GUI automation Python module. It programmatically controls the mouse & keyboard. It has screenshot features and image finding features. PyAutoGUI works on Windows, macOS, and Linux, and runs on Python 2 and 3.
You can refer to the Pyautogui's documentation
Installation
pip install pyautogui
The source is available on github.com/asweigart/pyautogui
Time to Code!

You can find my code at GitHub
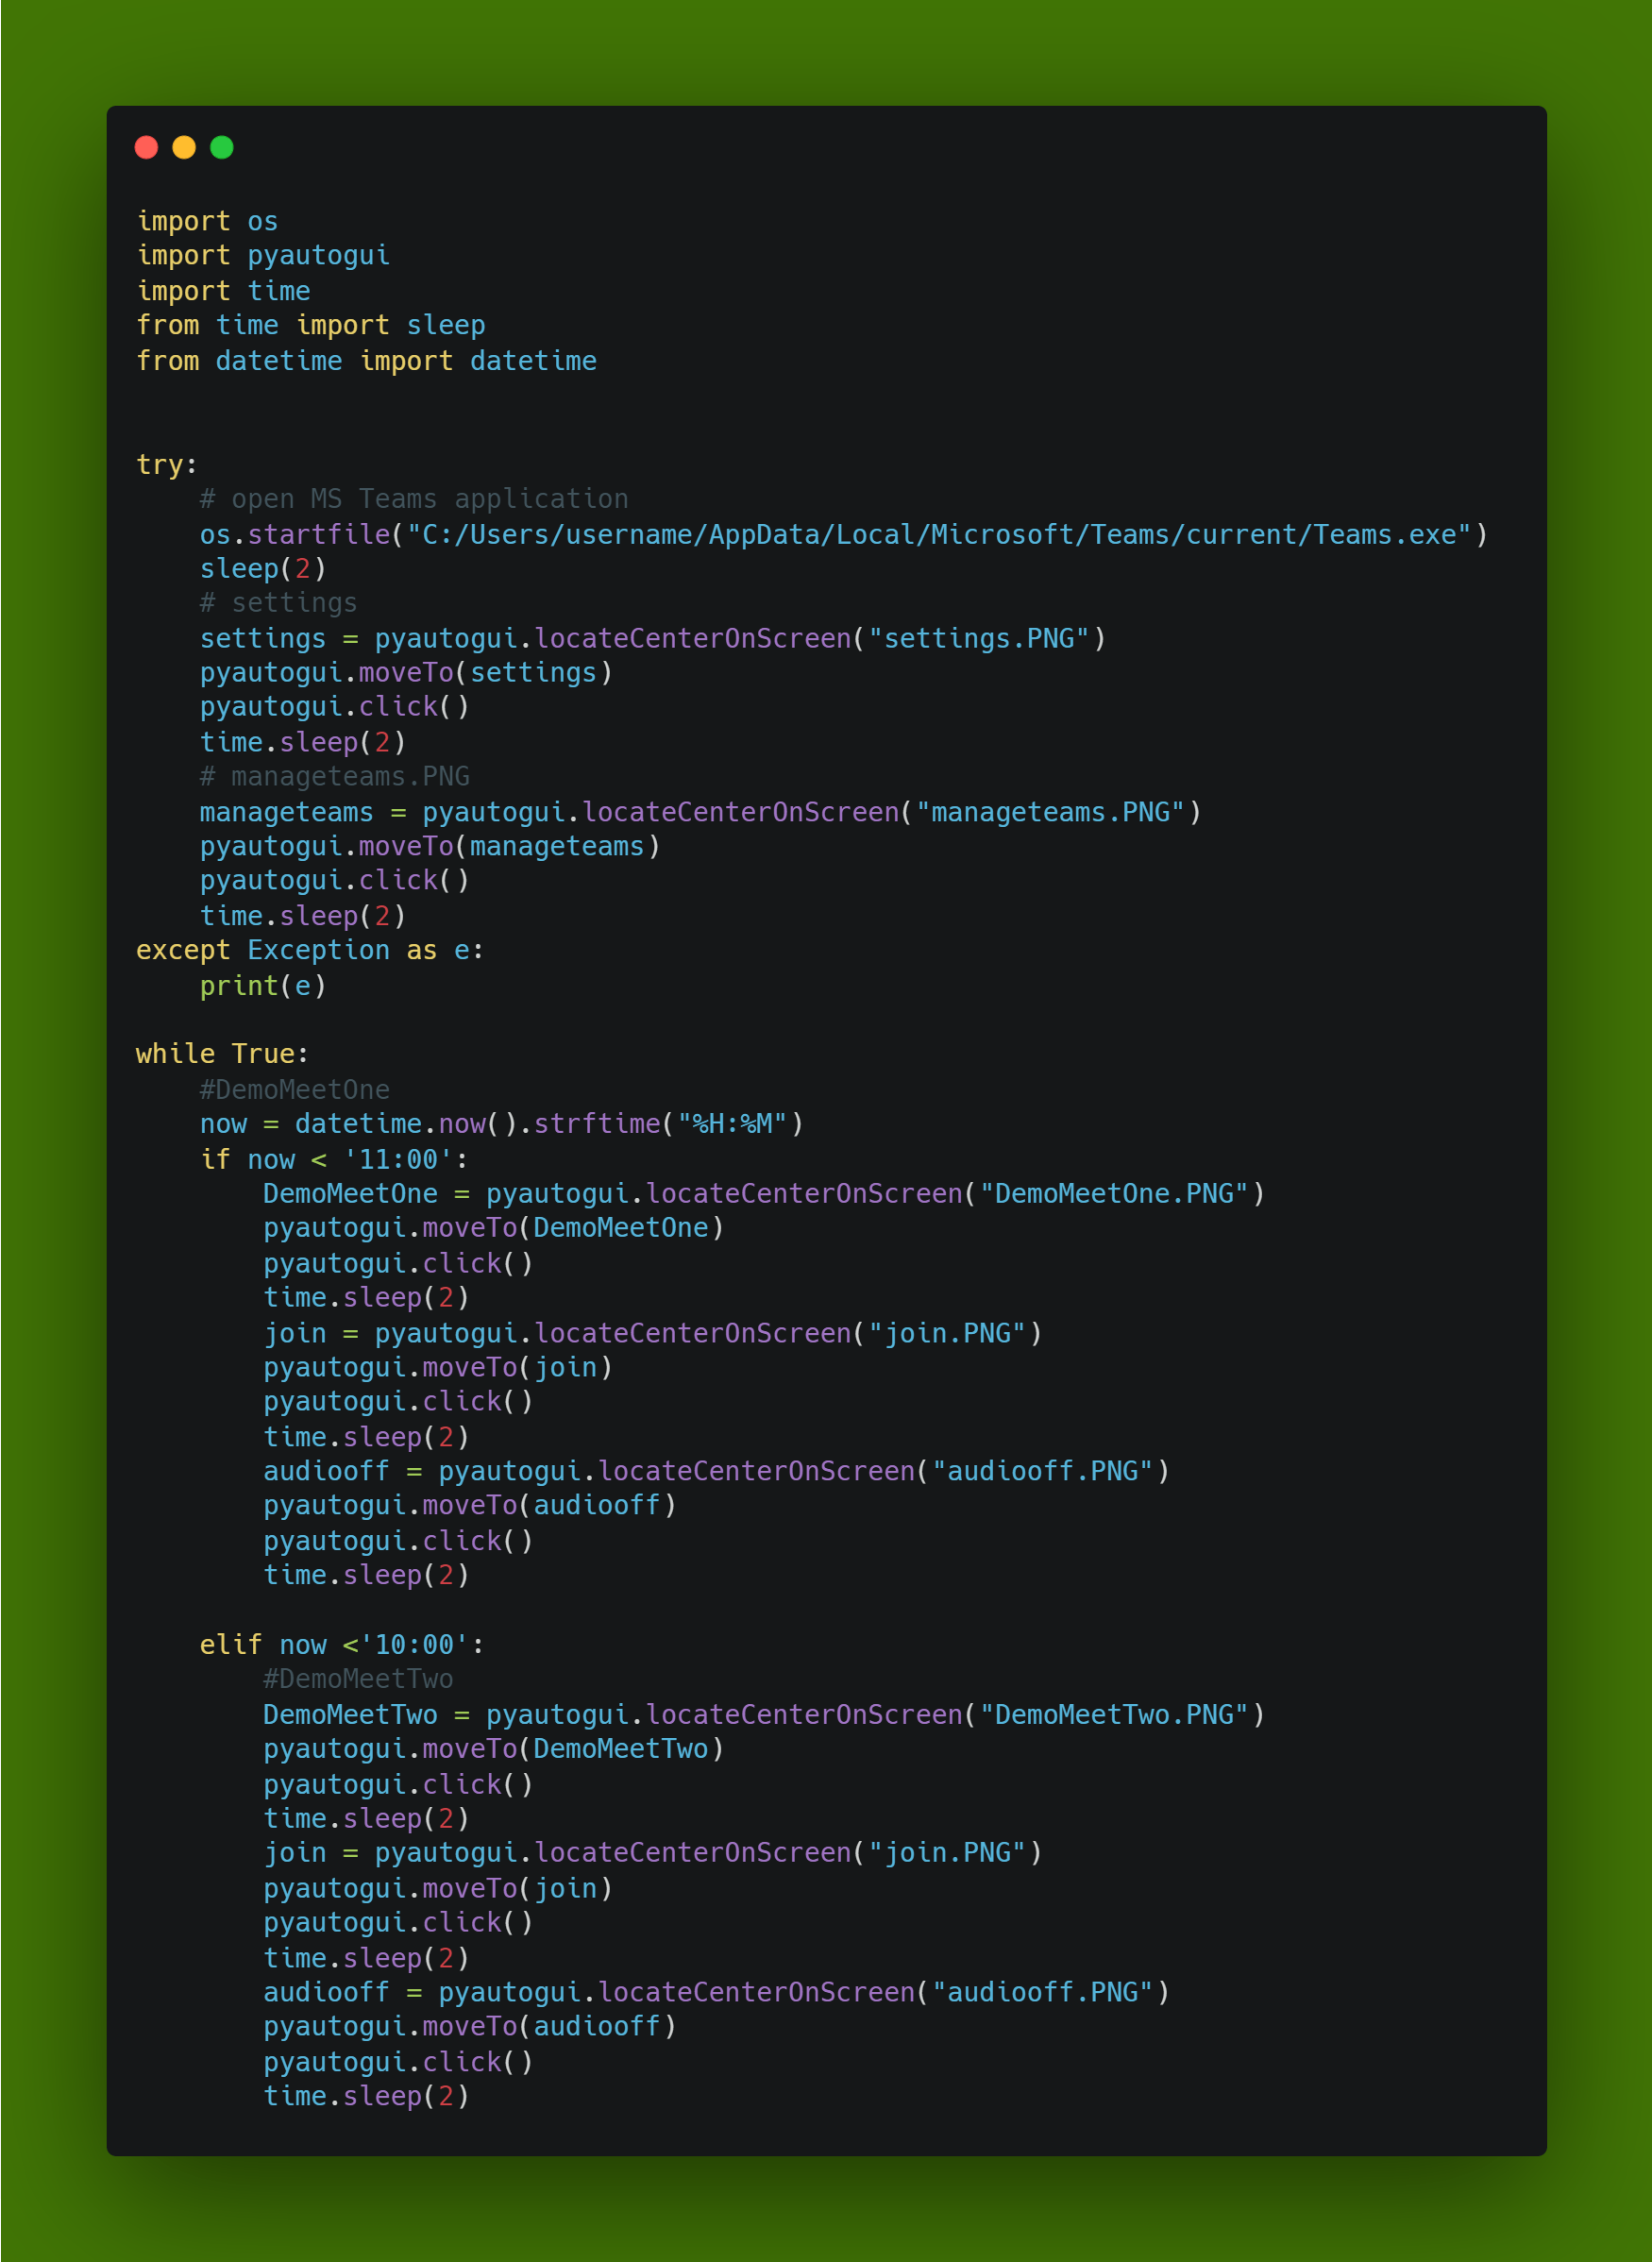
Now let's Understand the code.
An infinite loop keeps checking the current time of the system using this function.
datetime.now()
Necessary modules
we will import the necessary modules.
import os
import pyautogui
import time
from time import sleep
from datetime import datetime
Before startUp, make sure that the Teams application is closed.
Opening Teams The Teams app is opened using
os.startfile()
os.startfile("C:/Users/username/AppData/Local/Microsoft/Teams/current/Teams.exe")
locateCenterOnScreen()
pyautogui.locateCenterOnScreen() function locates the center of the first found instance of the image on the screen.
Capture the screenshot of settings button and use the below chunk of code to move the mouse to that button and click it.

pyautogui.moveTo()
moves the cursor to that location.
pyautogui.click()
performs a click operation.
settings = pyautogui.locateCenterOnScreen("settings.PNG")
pyautogui.moveTo(settings)
pyautogui.click()
time.sleep(2)
Moving forward, we need to click on Manage Teams button to get a list of teams vertically.
manageteams = pyautogui.locateCenterOnScreen("manageteams.PNG")
pyautogui.moveTo(manageteams)
pyautogui.click()
time.sleep(2)
Next, you will get the Teams List tab screen.
Now we run the below code snippet in an infinite loop.
We get the current time and compare it with the class ending time.
For example,
If the current time is 10:00 and my class is at 10:00 but the meeting has started. If I give my class ending time i.e 11:00 then as soon as the meeting starts the scripts automatically clicks on join button with camera and microphone turned off.
Capture screenshot of your class name. DemoMeetOne and DemoMeetTwo in my case
Similarily Join button

- Camera and microphone too.

if now < '18:00':
    DemoMeetOne=pyautogui.locateCenterOnScreen("DemoMeetOne.PNG")
    pyautogui.moveTo(DemoMeetOne)
    pyautogui.click()
    time.sleep(2)
    join = pyautogui.locateCenterOnScreen("join.PNG")
    pyautogui.moveTo(join)
    pyautogui.click()
    time.sleep(2)
    audiooff = pyautogui.locateCenterOnScreen("audiooff.PNG")
    pyautogui.moveTo(audiooff)
    pyautogui.click()
    time.sleep(2)
I have done it for 2 classes.
DemoMeetOne
DemoMeetTwo you can do it for any number of classes you want.
You can find my code at GitHub
I have uploaded the entire code and all the necessary files in my repository. Please drop a star if you like it.
You can also connect with me on Twitter Also, have a look at my other Blogs:
- Python 3.9: All You need to know
- The Ultimate Python Resource hub
- GitHub CLI 1.0: All you need to know
- Become a Better Programmer
- How to make your own Google Chrome Extension
- Create your own Audiobook from any pdf with Python
- You are Important & so is your Mental Health!
If you have any Queries or Suggestions, please reach out to me in the Comments Section below.
