Hello world!
In this Blog article, we will learn how to Turn any image to an ASCII art. We will see the implementation in Python.
Check out the Repository for Ultimate Resource in python. Drop a star if you find it useful! Got anything to add? Open a PR on the same!
You can refer to my YouTube video Tutorial to see a working tutorial for better Understanding and a step by step Guide of the same.
What will be covered in this Blog
1. What is ASCII?
3. Basics of pywhatkit Module
4. Converting any image to ASCII art using Python
Let's get started!
What is ASCII?:
ASCII, abbreviated from American Standard Code for Information Interchange.
ASCII is a character encoding standard for electronic communication. ASCII codes represent text in computers, telecommunications equipment, and other devices.
If you wish to know more about it, you can refer to ASCII's Wikipedia Page.
Module Used:
pywhatkit Module:
PyWhatKit is a Python library with various helpful features. It is an easy to use library which does not requires you to do some additional setup.
This module has lots of other cool features as well. Feel free and go ahead to explore them or if you wish I can write an article about them.
If you wish to know more about it, you can refer to pywhatkit Module Documentation.
Now that you are familiar with ASCII basics and have acquired basic knowledge of pywhatkit module, we can move forward to the coding section.
Time to Code!
You can find all the code at my GitHub Repository. Drop a star if you find it useful.

In order to access the Python library, you need to install it into your Python environment
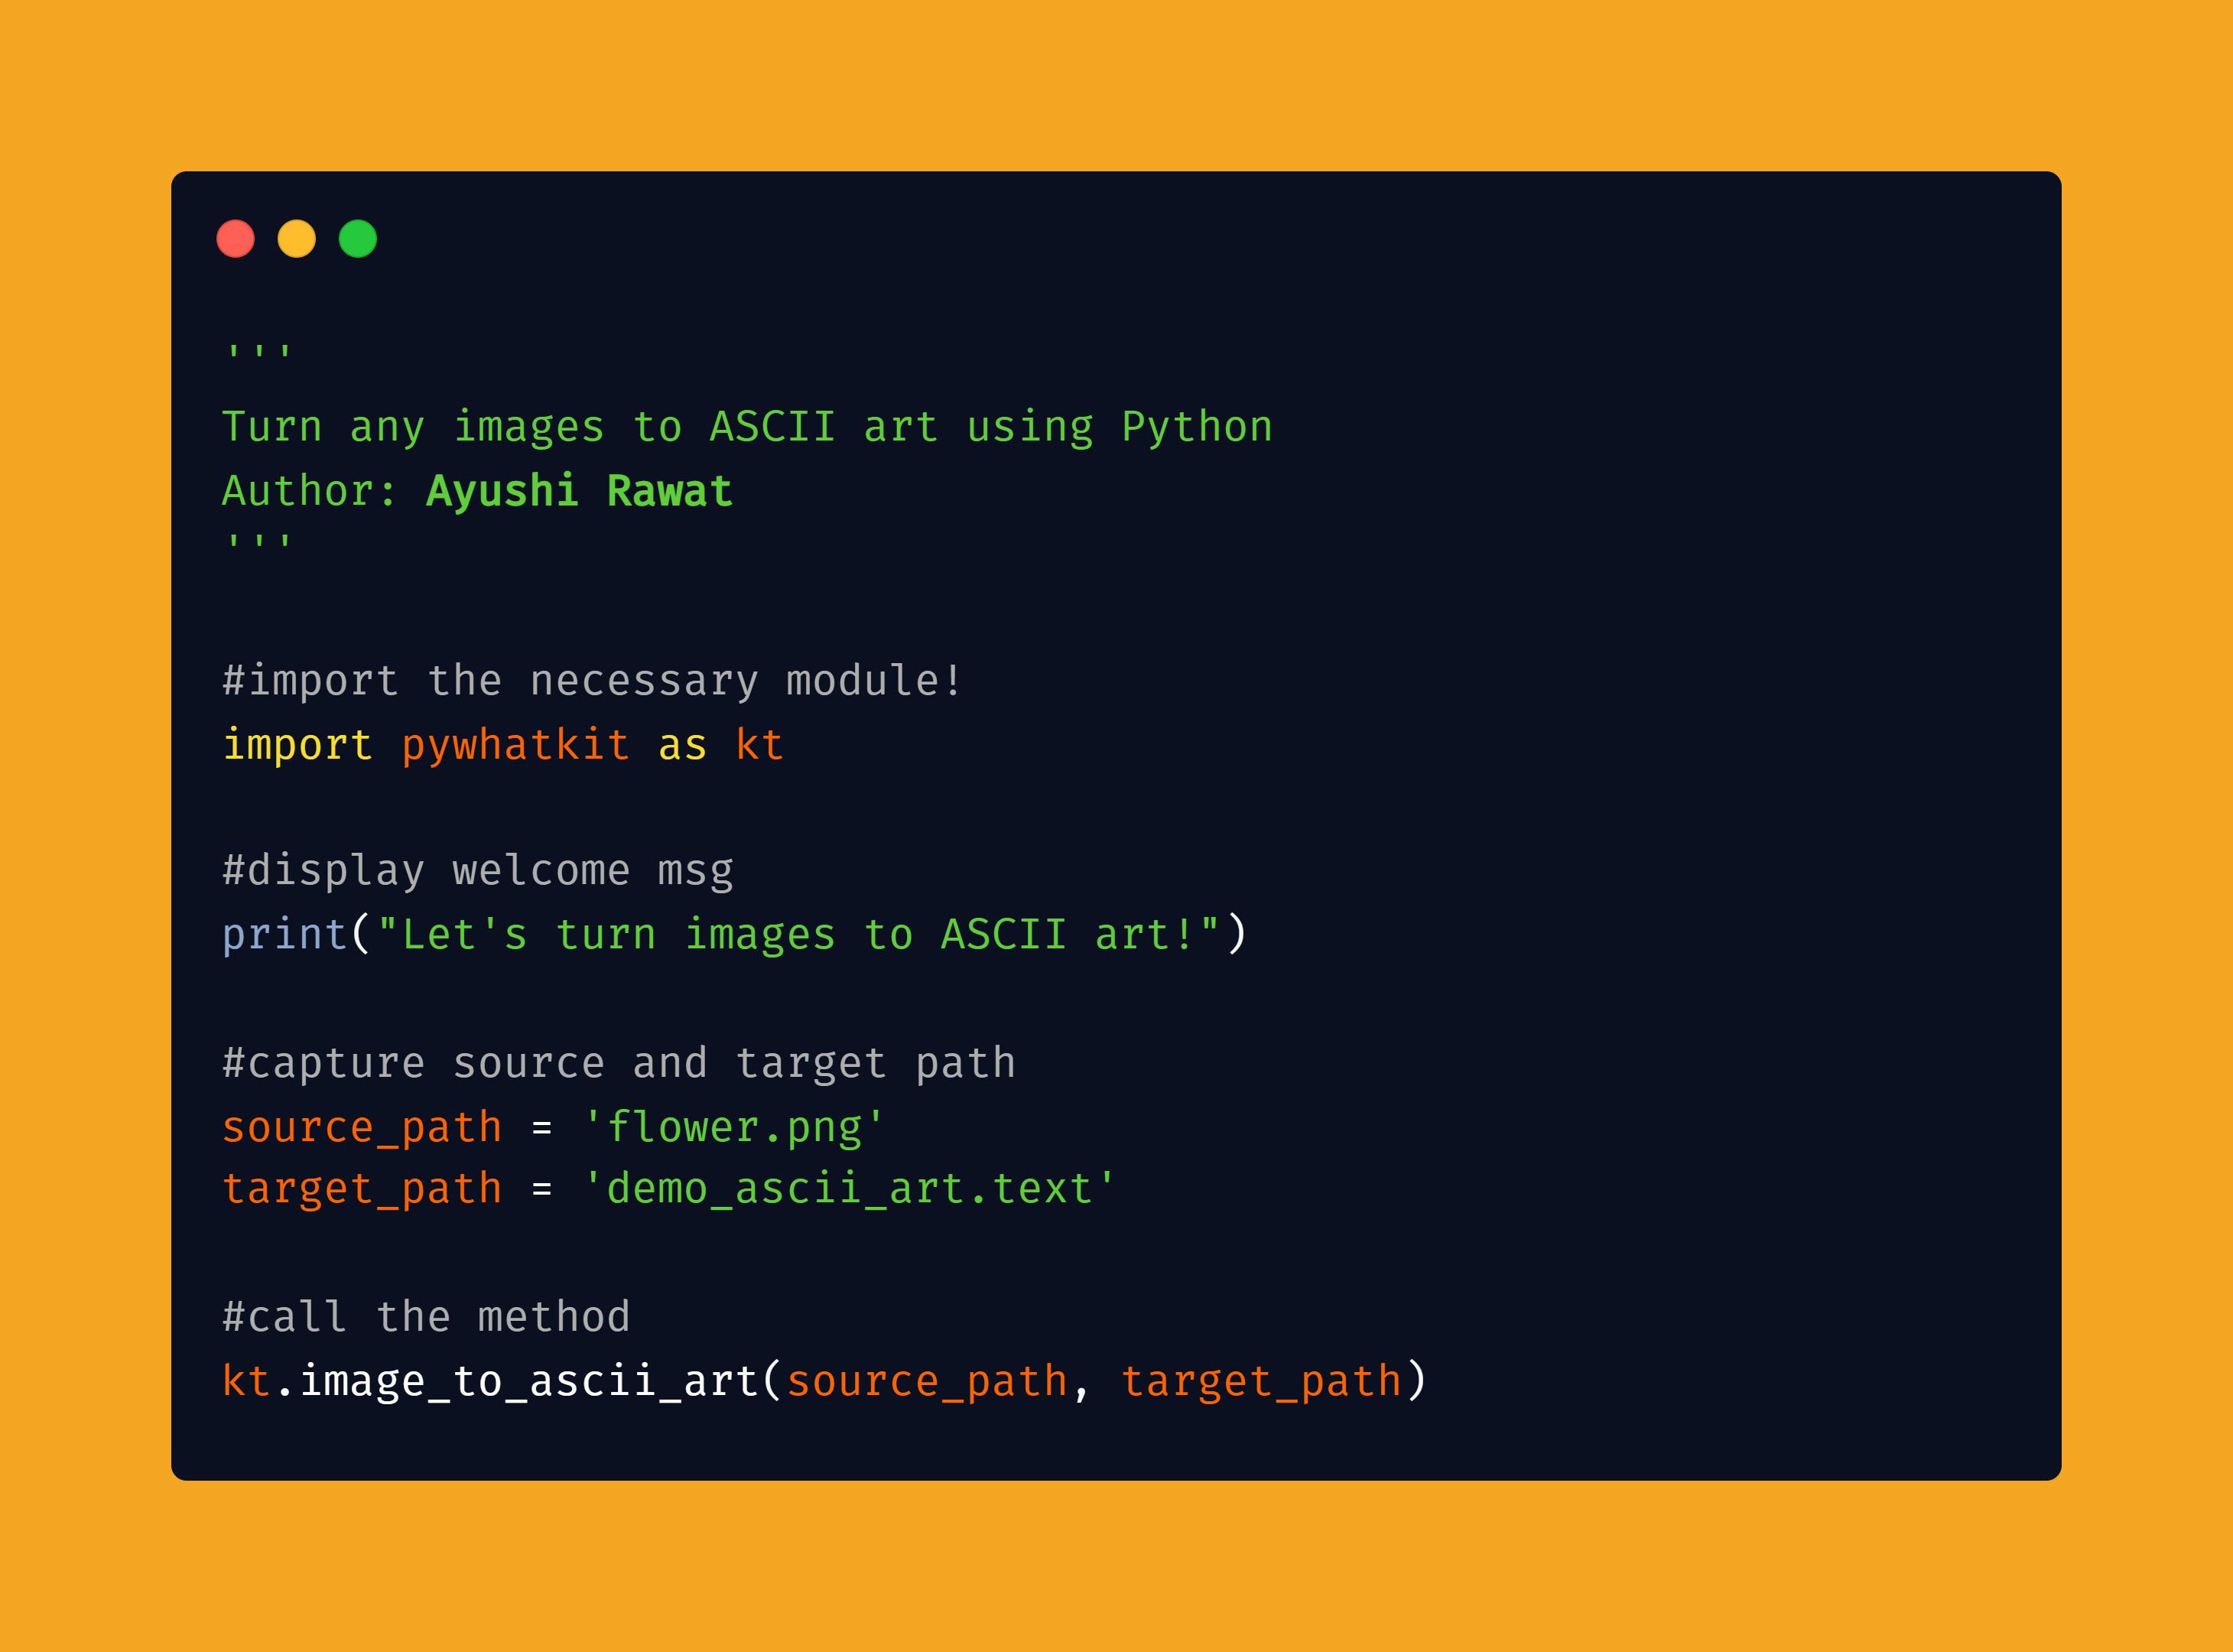
pip install pywhatkit as kt
Now, we need to import the package in our python script. Use the following command to do so.
import pywhatkit as kt
Now that we have imported the library using the command import pywhatkit as kt, let's proceed.
Let's display a welcome message. we will make use of print method for the same.
print("Let's turn images to ASCII art!")
Now, let's capture the image you wish to convert to ASCII art and let's store it in source_path.

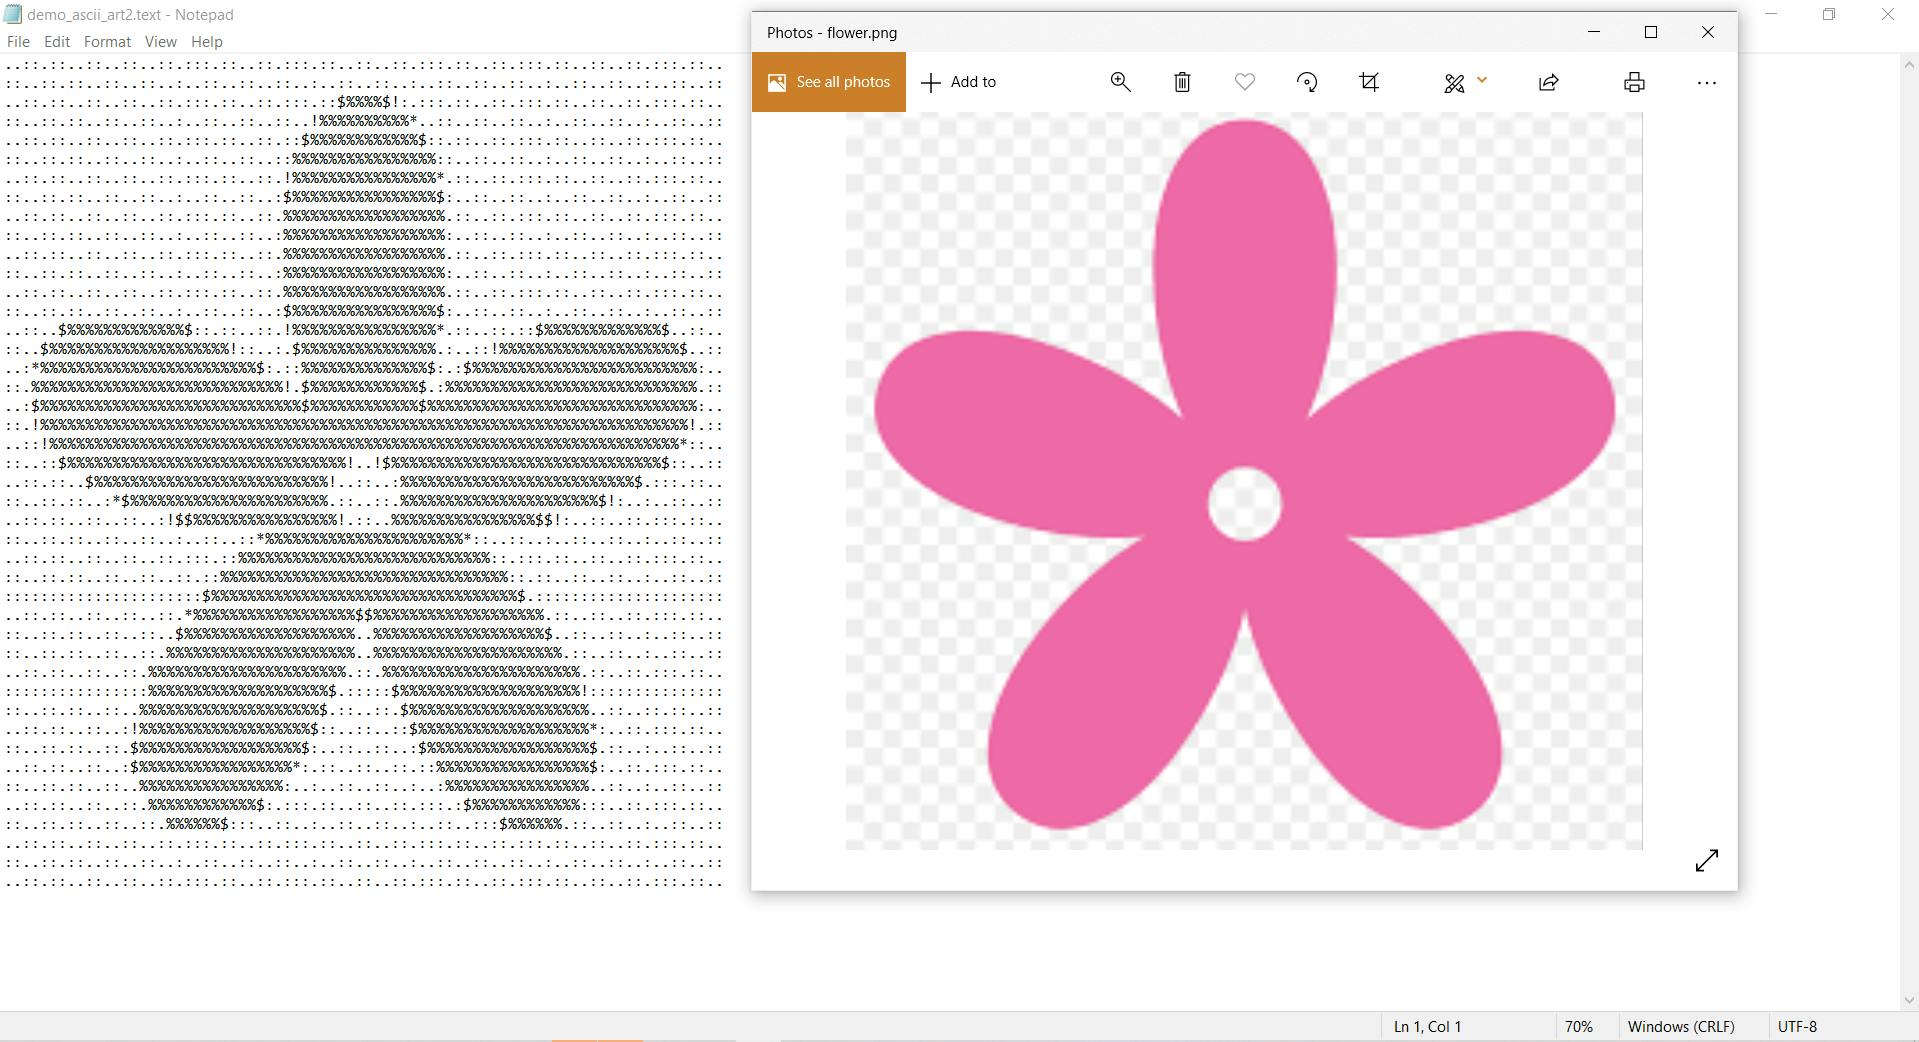
This is the image I am going to use as demo here. The image depicts a flower. Make sure to give the correct path here. If the python script could not locate an image with the given name at the mentioned path, it will result into an error.
Next, create a placeholder to store the output. As its an ASCII file, make sure to use the correct extension, i.e. .text and let's store it in target_path.
source_path = 'flower.png'
target_path = 'demo_ascii_art.text'
Finally, let's call image_to_ascii_art method.
kt.image_to_ascii_art(source_path, target_path)
NOTE: The output file will be generated in the same folder where the python script resides if no alternate path is mentioned.
Let's have a look at the output file and its comparison with the actual image file.

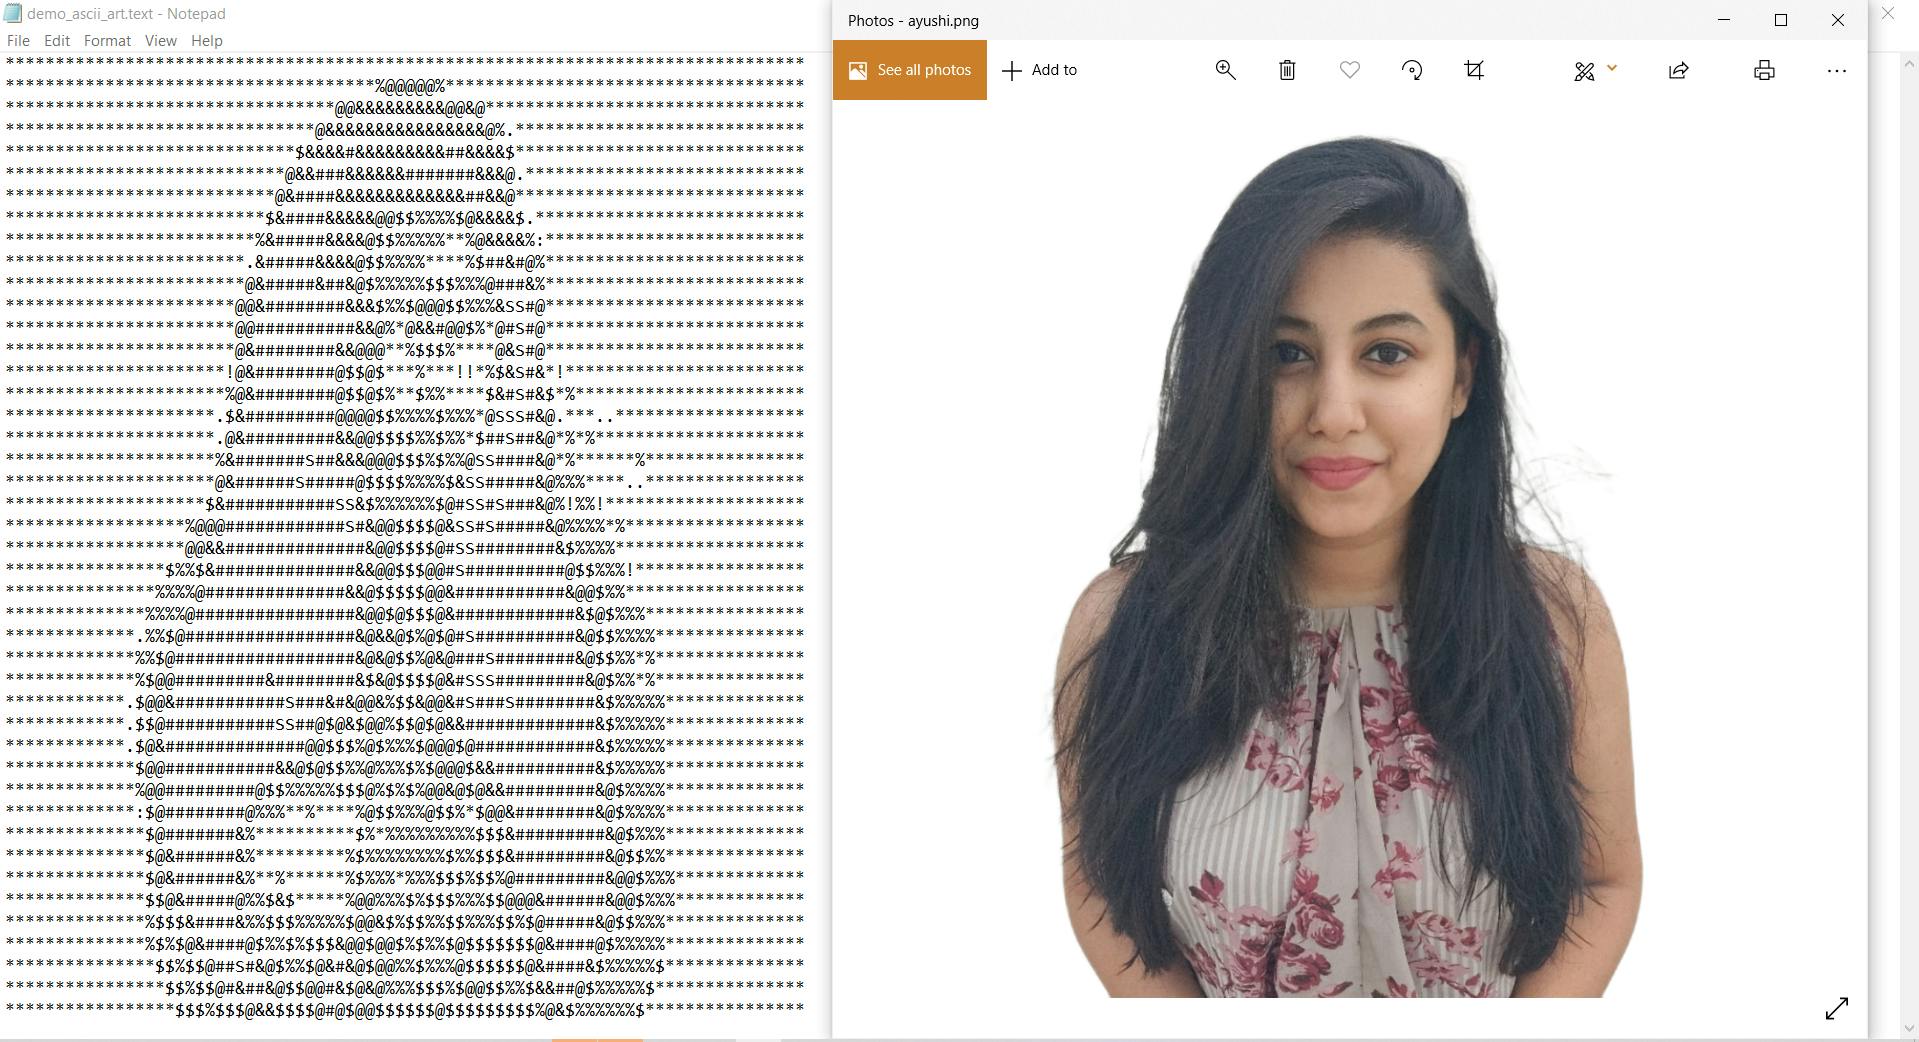
Let's have a look at another example. I am making use of my image as demo here. Post successful run, a new text file will get created and will look something like this

With these steps, we have successfully Turned an image to an ASCII art using python. That's it!
Simple, isn't it? Hope this tutorial has helped. I would strongly recommend you to Check out the YouTube video of the same and don't forget to subscribe my Channel.
You can play around with the pywhatkit library and even explore more features.
You can find all the code at my GitHub Repository. Drop a star if you find it useful.
Thank you for reading, I would love to connect with you at Twitter | LinkedIn.
Do share your valuable suggestions, I appreciate your honest feedback!
You should definitely check out my other Blogs:
- Python 3.9: All You need to know
- The Ultimate Python Resource hub
- GitHub CLI 1.0: All you need to know
- Become a Better Programmer
- How to make your own Google Chrome Extension
- Create your own Audiobook from any pdf with Python
- You are Important & so is your Mental Health!
Resources:
See you in my next Blog article, Take care!

